Have you come across this situation… What if you could eat one of the food items you like very much only once in a year? It’s difficult to even imagine such a thing in this era of instant gratification, right? Well, this particular recipe belongs to that category. You can make this only once a year on Maundy Thursday, in remembrance of Passover. You can read more about it’s significance here.
As a child, I always used to wonder why these grownups were making so much fuss about cooking this? I mean, the preparation of this Appam and Paal is taken very seriously, at least at my place. It’s usually done by the eldest female member of the family. The mood in the kitchen would be completely different from normal days. The Appam and Paal is prepared with extra care and caution. The preparation would start around noon time and once the batter is ready, a small prayer is said while placing the Cross on the batter. By evening time, the whole family comes together for prayer and cutting the Appam.
On a regular basis I like my space in the kitchen. I like to move things in my own pace and everything remains where I keep it, yep I’m a bit of control freak when it comes to my space ;) Ok, what I was trying to say is, how-much- ever I like my space in the kitchen, every year when I make this by myself, standing alone in the quietness of my kitchen, I cannot help but wish, there is total chaos in my kitchen with people and dishes all over the place! Strange isnt it, how emotions can affect your normal self?

Though I’m making it since 2005, every year without fail, I’d be calling my Amma and Tesschechy (my aunt), at least 10 times while making this. I’ve become one of those fussy grownups! By trying to be extra cautious I become extra clumsy :( I tend to have ‘n’ number of doubts every year, may be because it’s made only once in a year or may be because I’m weighed down by its importance, sigh!
So, last year I thought enough is enough and decided to write down each and every detail about it and also take step by step pictures. I wanted to share with you the step by step pictures and the updated recipe. The qty of the ingredients remains the same. There is a small change in the method. However I’ve kept the old post too, if in case you’re used to that recipe :)
Again, even if all the details are in place, I’m sure I’ll be calling or What’s – apping Amma this year too, you know just to make sure that I’m not alone in the kitchen on this day :) After all, no man is an island!
Here you go with the step by step pictures…
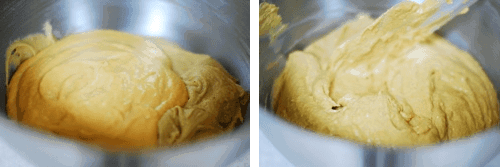
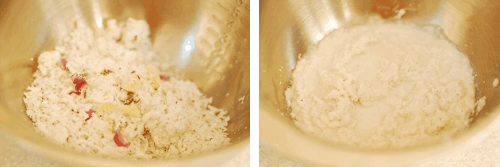
Combine salt and roasted rice flour. Add boiling water gradually and using a wooden spatula mix the dough. Add water till the dough comes together. Using your hands (be careful the dough can be very hot), knead together until you get a smooth and soft dough…

Drain the soaked ural dal and grind it into a smooth paste by adding 1/4 cup plus 2 tbspn water…

Grind coconut with garlic, small onion and jeera with 1/2 cup water, until everything is combined well…
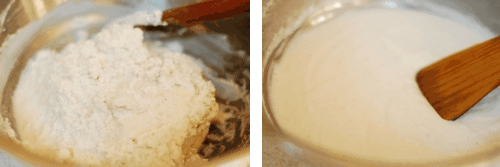
Add urad dal paste and coconut paste to the dough. Combine everything well. The consistency of batter should be same as that of Idli batter…
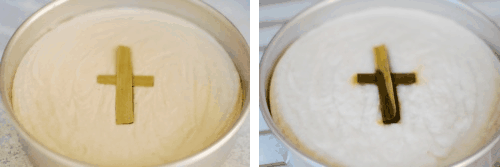
Transfer the batter to a well greased (I use coconut oil for greasing the tin) steaming tin. Place the cross made with palm leaves on the middle of the batter. Steam in appachembu/steamer for 25-35 minutes…
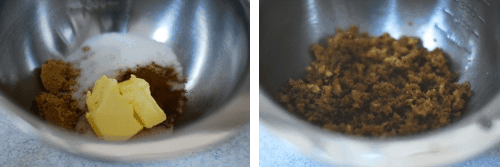
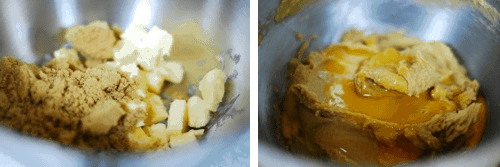
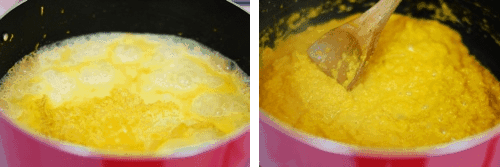
Melt jaggery with a little water. When it is completely melted, strain it…

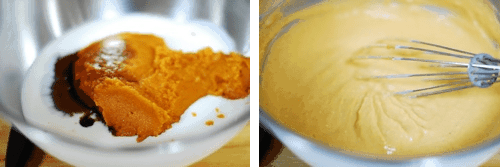
Add 3 cups medium thick coconut milk and stir continuously and when more than half of it is evaporated, add thick coconut milk and stir well…

For thickening the paal, take 1 or 2 tbsp rice powder and mix it with hot water and add to paal and cook for a few minutes…

- Rice powder – 1 cup
- Urad dal (uzhunnu) – ¼ cup
- Coconut – 1 cup, heaped
- Garlic – 1 if it is big and 2 if its small
- Small onion – 3-5
- Jeera – a pinch
- Water – 1 – 1½ cups
- Jaggery – 400gm
- Medium thick coconut milk – 3 cup
- Thick coconut milk – 1 cup
- To Make Appam:
- Soak urad dal for 2 hours.
- Combine salt and roasted rice flour. Add boiling water gradually and using a wooden spatula mix the dough. Add water till the dough comes together. Using your hands (be careful the dough can be very hot), knead together until you get a smooth and soft dough. The dough should not be too tight and it should not be sticky also. Cover the dough with a wet cloth.
- Drain the soaked ural dal and grind it into a smooth paste by adding ¼ cup plus 2 tbspn water. Grind coconut with garlic, small onion and jeera with ½ cup water, until everything is combined well.
- Add urad dal paste and coconut paste to the dough. Combine everything well. The consistency of batter should be same as that of Idli batter.
- Transfer the batter to a well greased (I use coconut oil for greasing the tin) steaming tin. Place the cross made with palm leaves on the middle of the batter. Cover the tin with aluminium foil (optional).
- Let the water boil in steamer / appachembu. Steam in appachembu/steamer for 25-35 minutes (refer notes). Let it cool for sometime and then transfer to a serving dish. Use the same flame till the end, ie if you are using medium flame, cook on medium flame through out.
- To Make Paal:
- Melt jaggery with ½ cup water. When it is completely melted, strain it. Add 3 cups medium thick coconut milk and stir continuously and when more than half of it is evaporated, add thick coconut milk and stir well.
- Do not boil once the thick coconut milk is added. For thickening the paal, take 1 or 2 tbsp rice powder and mix it with hot water and add to paal and cook for a few minutes.
If the batter is lumpy after adding coconut and urad dal paste, run it in mixie for a few seconds. My appam gets cooked in 30-35 mins @ high flame. I use a 7 inch aluminium baking tin for the above qty.
The Paal tends to thicken a bit while resting, so adjust the consistency accordingly. You can add crushed cardamom (2) to Paal if you like . The left over can be stored in fridge for 2 days.

 Jose and I wish you and your loved ones a Happy and Blessed Easter! May the Risen Christ Bless you!


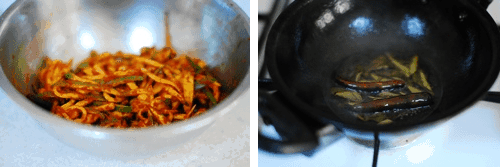
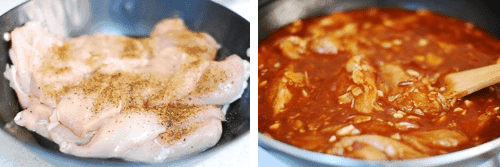
 Heat oil and add sliced onion. When it turns golden – dark brown, add crushed ginger garlic and green chilli. Cook for 3-4 mins…
 Add ground masala and cook till oil starts appearing, say 2-3 mins. Add sliced tomato and mix well…

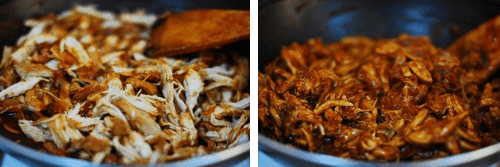
 Add thick coconut milk and stir well. Continue to cook on low flame for 5-7 mins and remove from fire. Add the fried small onion and curry leaves…